

Imagine a hot summer afternoon with the sun casting playful shadows through your kitchen window. You’re craving something cool, something sweet, yet a little unexpected. That’s where my Refreshing Dark Chocolate Kiwi Pops come into play. These delightful treats are a symphony of contrasts—tangy kiwi slices enveloped in a rich, dark chocolate coating, creating a balance that dances on your taste buds with every bite.
Origin and Inspiration
The idea for these pops came to me during a summer trip to a charming fruit market nestled in the heart of a coastal town. I stumbled upon a vibrant display of fresh kiwis, their fuzzy exteriors hiding a bright, tangy interior. The vendor, an elderly woman with a twinkle in her eye, insisted that kiwis were the best way to beat the summer heat. Inspired, I decided to pair them with my all-time favorite indulgence—dark chocolate. The unexpected pairing is reminiscent of those delightful surprises in life, where opposites attract and create something truly magical.
Unique Ingredients and Flavors
What makes this recipe truly special is the use of ripe, juicy kiwis, which bring a refreshing zing that perfectly complements the deep, bittersweet notes of dark chocolate. The kiwis are sliced into thick, juicy rounds, each one a little slice of summer. The dark chocolate, with its luxurious sheen, adds not just flavor but a satisfying crunch that contrasts beautifully with the kiwi’s tender flesh. And here’s a little secret: a sprinkle of sea salt right before the chocolate sets. It enhances the flavors, like a maestro tuning an orchestra, bringing out the natural sweetness of the fruit and the richness of the chocolate.


Cooking Techniques
Crafting these pops is an exercise in simplicity and elegance. The technique is straightforward, yet each step is crucial for achieving the perfect balance. The chocolate needs to be melted to just the right consistency—smooth and glossy, ready to coat the kiwi slices with precision. Timing is everything; the kiwi must be frozen just enough to hold its shape but not so much that it loses its juicy essence. It’s a dance of temperatures, a culinary waltz that results in a treat that’s as beautiful as it is delicious.
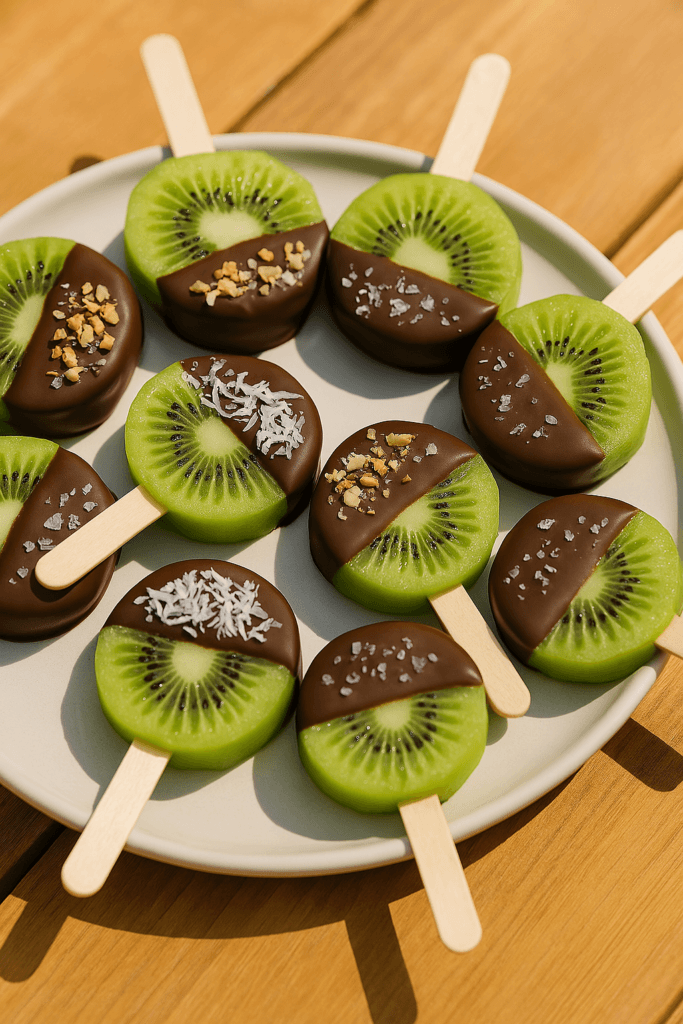
Refreshing Dark Chocolate Kiwi Pops for Summer Snacking
Description
Satisfy your sweet cravings with these easy-to-make, deliciously refreshing chocolate-covered kiwi pops. A delightful balance of tart and sweet, perfect for any summer day.
Ingredients
Fruit Base
Chocolate Coating
Optional Toppings
Instructions
Preparing the Kiwis
-
Peel and Slice the Kiwis
Gently peel the kiwis using a vegetable peeler or a sharp knife to remove the fuzzy skin. Once peeled, slice each kiwi into thick, even rounds—about half an inch thick.Using a sharp knife will help you get cleaner slices, which means prettier pops! -
Insert the Popsicle Sticks
Carefully insert a popsicle stick into each kiwi slice, pushing it in at least halfway for stability.Make sure the sticks are secure but be gentle to prevent the kiwi slices from breaking.
Melting the Chocolate
-
Melt the Dark Chocolate
Break the dark chocolate into small pieces and place them in a microwave-safe bowl. Microwave in 30-second intervals, stirring in between, until fully melted and smooth.If you prefer, you can also melt the chocolate using a double boiler for more controlled heating.
Assembling the Pops
-
Dip the Kiwi Slices
Dip each kiwi slice halfway into the melted chocolate, allowing any excess to drip back into the bowl.For a thicker chocolate coating, you can dip the slices twice, allowing the first layer to set before dipping again. -
Add Toppings
Sprinkle your favorite toppings, such as crushed nuts, shredded coconut, or sea salt, onto the chocolate-coated portion of each kiwi slice.Act quickly before the chocolate sets to ensure the toppings stick well.
Setting the Pops
-
Cool and Set
Place the chocolate-covered kiwi pops on a parchment-lined baking sheet and refrigerate for about 30 minutes, or until the chocolate is fully set.If you're in a hurry, a quick 10-minute freeze can help set the chocolate faster.
Note
For optimal flavor, select ripe yet firm kiwis to ensure the pops retain their shape when dipped in chocolate. When melting the dark chocolate, use a double boiler to prevent scorching and maintain a smooth consistency. If you prefer a slightly sweeter treat, you can add a touch of honey or agave syrup to the melted chocolate. To enhance the flavor, consider sprinkling a pinch of sea salt or finely chopped nuts onto the chocolate coating before it sets. For a dramatic contrast, experiment with white chocolate or a mix of both dark and milk chocolates. Before serving, allow the pops to rest at room temperature for a few minutes to soften slightly for a perfect bite. Store any leftovers in an airtight container in the freezer for up to two weeks to maintain freshness and flavor.