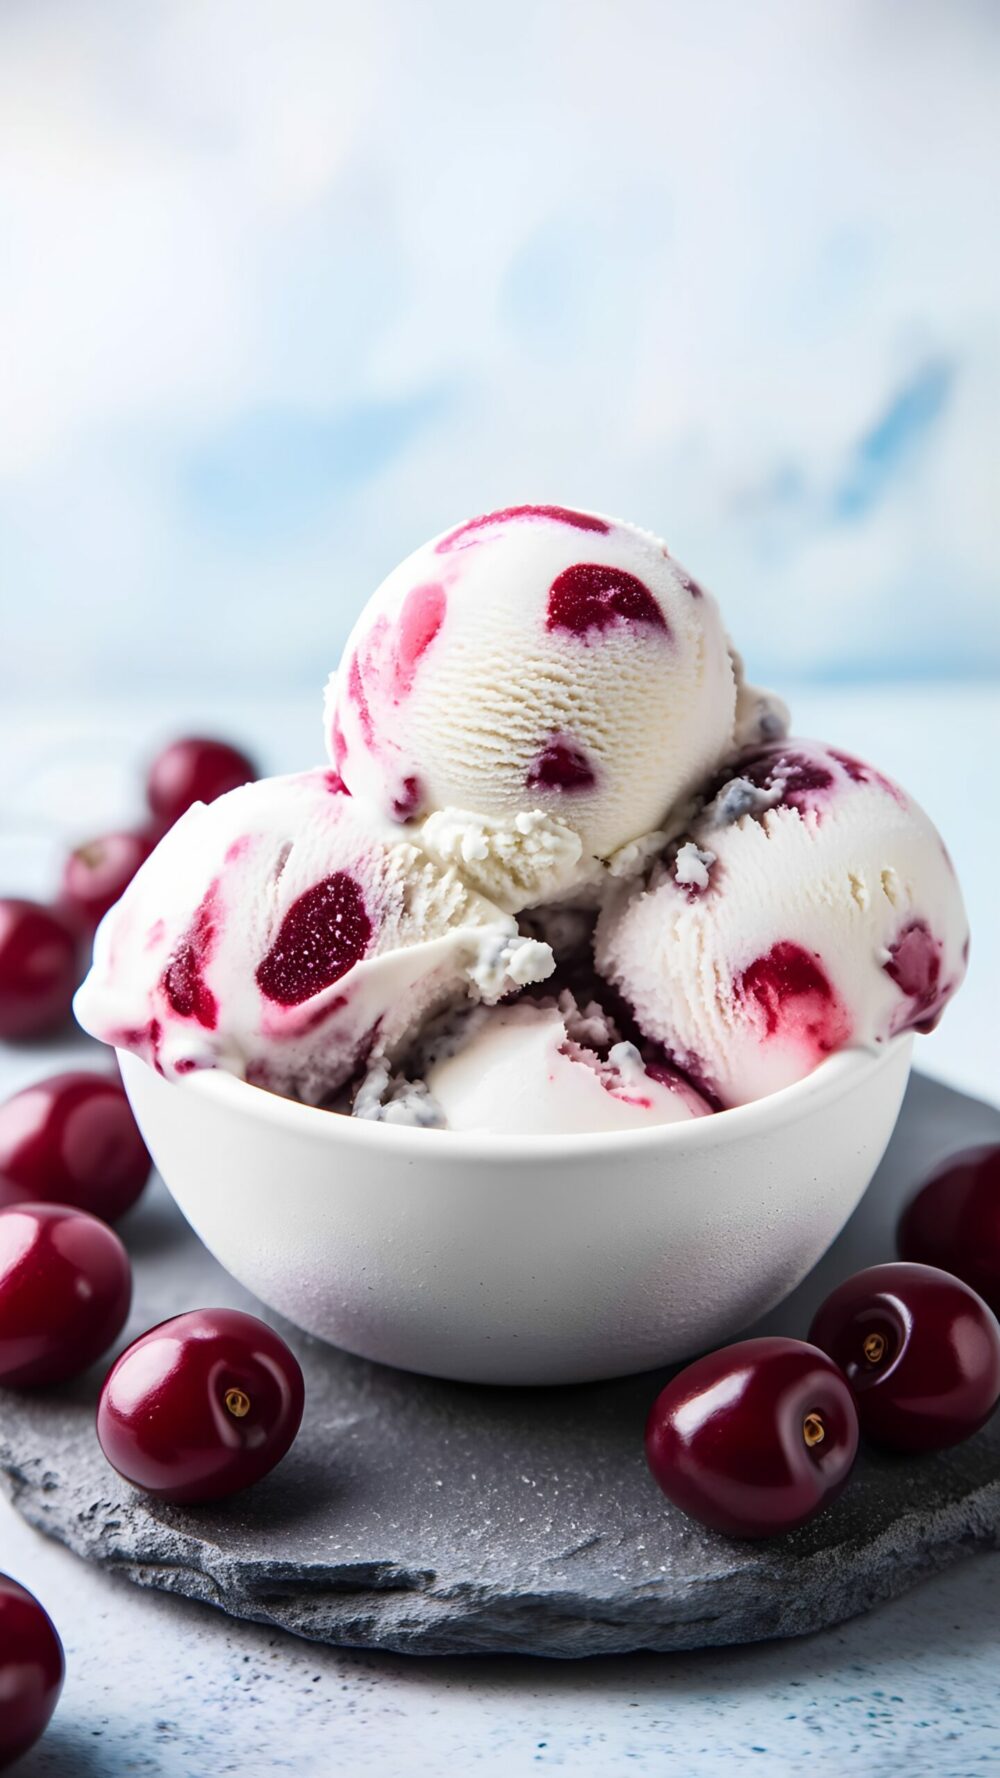

No-Churn Cherry Ice Cream is a delightful and indulgent treat that captures the essence of summer in every creamy, chunky bite. Imagine plump, juicy cherries swirled into a velvety mixture that doesn’t require an ice cream machine, making it the perfect go-to dessert for those hot days when you crave something refreshing without the hassle.
Origin of Cherry Ice Cream
Cherry ice cream has its roots in the rich tradition of ice cream making that dates back centuries. It is believed that the concept of ice cream originated in ancient China, gradually making its way to Europe and becoming a staple in American kitchens by the 18th century. The allure of cherries, particularly in the United States, is deeply tied to the country’s agricultural bounty, particularly in regions like Michigan and Washington, which are famous for their sweet cherries. This dessert encapsulates not just a flavor but a slice of summer nostalgia, reminiscent of hot days spent picking fruit and enjoying simple pleasures.
Unique Ingredients and Flavors
What sets this No-Churn Cherry Ice Cream apart is its simple yet high-quality ingredients. The combination of heavy cream and sweetened condensed milk creates a luxurious base that is both rich and airy, capturing the essence of traditional ice cream without the need for churning. The cherries add a pop of flavor and texture, bringing a delightful contrast to the smooth creaminess. You can even enhance the flavor with a splash of vanilla extract or a hint of almond extract, giving it an extra depth that dances on your palate.


Each spoonful is a harmonious blend of sweet and tart, creamy and chunky, making it a perfect treat for gatherings or quiet evenings at home. The vibrant color and inviting aroma of cherries not only elevate the visual appeal but also evoke a sense of joy and comfort, making this ice cream a true celebration of flavor.

No-Churn Cherry Ice Cream – Creamy & Chunky Treat
Description
Creamy, dreamy, and loaded with juicy cherry pieces, this no-churn cherry ice cream is a simple yet luxurious dessert that will have everyone asking for seconds.
Ingredients
No-Churn Cherry Ice Cream Ingredients
Instructions
Prepare the Cherries
-
Wash and Pit the Cherries
Start by rinsing 2 cups of fresh cherries under cool water. Remove the stems and pit them carefully using a cherry pitter or a small knife. This step is crucial for avoiding any unpleasant bites of pit in your ice cream.If cherries are out of season, feel free to use frozen cherries. Just let them thaw before proceeding to the next step. -
Chop the Cherries
Once pitted, chop the cherries into halves or quarters, depending on your preference for chunky bits in the ice cream. Set them aside while we whip up the base.You can add a lemon juice or if you want a sweeter ice cream, sprinkle a tablespoon of sugar over the chopped cherries and let them sit for about 10 minutes to release their juices.
Make the Ice Cream Base
-
Whip the Cream
In a large mixing bowl, pour in 2 cups of heavy cream. Using an electric mixer, whip the cream on medium-high speed until soft peaks form. This will give your ice cream that luscious texture we all love.Be careful not to over-whip; you want it fluffy, not butter! -
Add Sweetened Condensed Milk
Gently fold in one 14-ounce can of sweetened condensed milk into the whipped cream until well combined. This is where the magic happens—the sweetened condensed milk adds creaminess and sweetness without the need for churning.You can also add a splash of vanilla extract for extra flavor at this stage.
Combine and Freeze
-
Fold in the Cherries
Carefully fold the chopped cherries into the ice cream mixture. You want to maintain some of that whipped cream fluffiness, so be gentle!Feel free to reserve a few cherry pieces to sprinkle on top before freezing for a beautiful presentation. -
Transfer to a Container
Pour the mixture into a freezer-safe container or a loaf pan. Smooth the top with a spatula. If you reserved any cherry pieces, sprinkle them on top now for a pop of color.Cover with a lid or plastic wrap to prevent ice crystals from forming. -
Freeze Until Firm
Place the container in the freezer for at least 4-6 hours, or until the ice cream is completely firm. Patience is key here—the longer it freezes, the creamier it will be!If you want to serve it right away, let it sit at room temperature for about 10 minutes before scooping.
Note
- Use fresh, ripe cherries for the best flavor; if out of season, frozen cherries work well too.
- Pit and chop cherries into bite-sized pieces for a delightful chunky texture.
- Consider adding a splash of vanilla extract for an extra layer of flavor.
- Sweeten to taste; adjust based on the tartness of the cherries used.
- For a richer flavor, fold in a tablespoon of almond extract along with the cherries.
- Whipping the cream to soft peaks before folding in will give the ice cream a lighter texture.
- Ensure the mixture is well combined but don’t overmix; you want to keep some chunks for texture.
- Freeze in a metal loaf pan; it helps the mixture freeze faster and maintain a creamy consistency.
- Let the ice cream sit out for a few minutes before scooping for easier serving.
- Store in an airtight container in the freezer; it can last up to two weeks, but best enjoyed fresh.