
Cherry pie, with its luscious filling encased in a flaky, buttery crust, is a timeless dessert that brings warmth and nostalgia to any gathering. This classic treat, often associated with summer picnics and family reunions, has a special place in the hearts of many. The sweet-tart cherries, picked at their peak ripeness, create a vibrant, jewel-toned filling that bursts with flavor, while the golden crust provides the perfect contrast, both in texture and taste.
Origins and Inspirations
Dating back centuries, cherry pie has roots in various cultures, with early versions appearing in medieval Europe. It was often made with a combination of different fruits, but the distinctive cherry pie emerged as a favorite in American kitchens. The tradition of baking pies symbolizes home and comfort, a staple during harvest seasons and family celebrations. As you roll out your dough and prepare the filling, you can almost hear the echoes of laughter and storytelling that have accompanied this dish through generations.
Unique Ingredients and Flavors
What makes this cherry pie truly special is not just the sweetness of the cherries but the careful balance of flavors that elevates the entire experience. A hint of almond extract adds a warm, nutty undertone that complements the cherries beautifully, while a pinch of cinnamon introduces a subtle warmth, reminiscent of cozy afternoons spent with loved ones.


Cooking Techniques
The technique of blind-baking the crust ensures that every slice is served with a perfectly crisp base, preventing any sogginess from the juicy filling. And the art of crafting a woven lattice pie crust transforms the top into a rustic tapestry—both delicious and dazzling. This pie is more than just a dessert; it’s an invitation to create memories, to savor each bite, and to celebrate the simple pleasures of life.

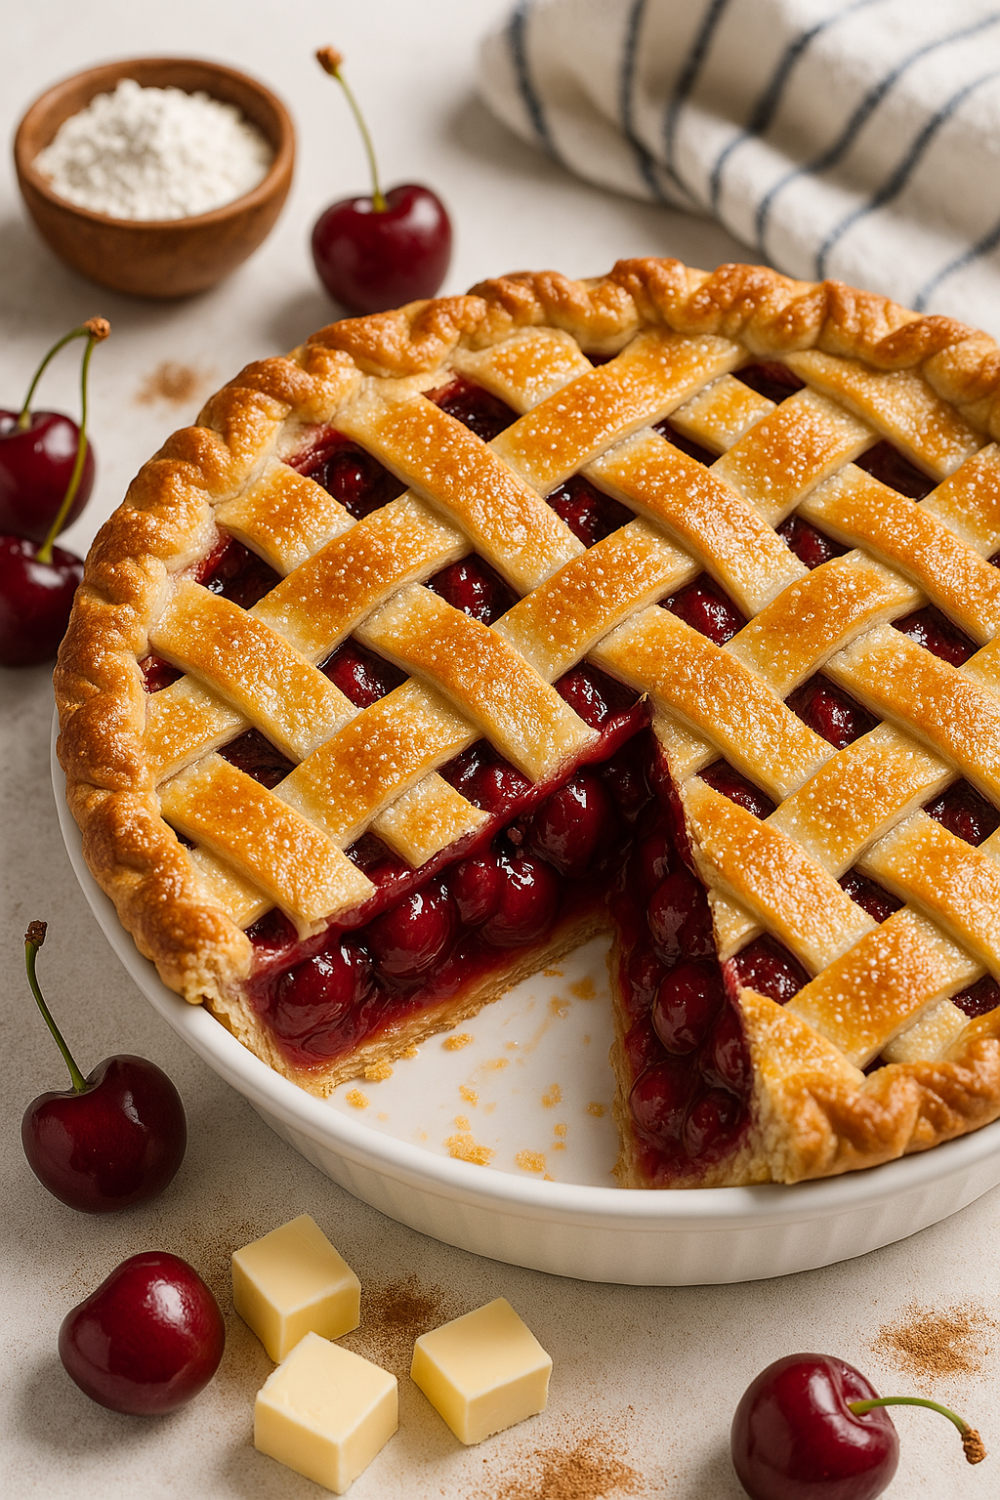
Homemade Classic Cherry Pie with Flaky Butter Crust
Description
This classic cherry pie boasts a perfect balance of sweetness and tartness, enveloped in a golden, flaky crust that’s so satisfying to make and enjoy with loved ones.
Ingredients
Flaky Butter Crust
Cherry Filling
Egg Wash and Sprinkle
Instructions
Preparing the Flaky Butter Crust
-
Mix the Dry Ingredients
In a large mixing bowl, combine 2 1/2 cups of all-purpose flour, 1 tablespoon of granulated sugar and 1 teaspoon of salt. Whisk them together until well blended.
Using a whisk helps aerate the flour, making your crust even flakier. -
Cut in the Butter
Add 1 cup (2 sticks) of cold unsalted butter, cut into small cubes. Using a pastry cutter or your fingers, work the butter into the flour mixture until it resembles coarse crumbs.Make sure your butter is very cold—this is what creates those lovely flaky layers in your crust! -
Add the Ice Water
Gradually add 6 to 8 tablespoons of ice water, one tablespoon at a time, mixing gently with a fork until the dough just comes together. Avoid overworking it.Do not overwork the dough. The dough should feel cohesive but not sticky. If it’s too crumbly, add a tiny bit more water. -
Chill the Dough
Divide the dough into two equal disks, wrap them in plastic wrap, and chill in the refrigerator for at least 1 hour, or up to overnight.Chilling allows the butter to firm up and the gluten to relax, which results in a tender crust.
Making the Cherry Filling
-
Prepare the Cherries
In a large bowl, combine 5 cups of pitted fresh or frozen cherries, 1/2 cup of granulated sugar, 3 tablespoons of cornstarch, 1 tablespoon of lemon juice, 1 teaspoon almond extract, 1/2 teaspoon vanilla extract and 1/2 teaspoon of ground cinnamon. Mix and toss gently until the cherries are well coated.
If using frozen cherries, let them thaw and drain excess liquid before mixing. Taste your cherries—adjust sugar to suit tart or sweet cherries. -
Let the Filling Sit
Allow the cherry mixture to sit for about 15-20 minutes. This will help draw out the juices and create a syrupy filling.Don't skip this step! It enhances the flavor and ensures your pie isn't runny.
Assembling the Pie
-
Roll Out the Bottom Crust
On a floured surface, roll out one disk of chilled dough into a circle about 12 inches in diameter. Transfer it to a 9-inch pie pan, gently pressing it into the bottom and up the sides.Use a light hand to avoid stretching the dough too much, which can lead to cracking. Ensure the bottom crust fully lines the pan—patch any tears before filling. -
Add the Cherry Filling
Pour the cherry filling into the prepared crust, spreading it evenly.Make sure to include all the juices; they add flavor! -
Create a Lattice Pie Crust on Top
Roll out the second disk of dough into a 12-inch circle and slice into 10 strips, about 1 inch wide. Lay half the strips vertically over your filled pie, then gently fold back every other strip. Weave a horizontal strip across, unfold the verticals, and repeat, alternating strips to form a woven pattern. Trim and tuck the edges, seal with the bottom crust, crimp decoratively.
Don’t rush the weave; a little patience creates a stunning bakery-worthy finish! If using a simple whole crust, cut slits for steam to escape. -
Chill the Pie
Chill the pie for 20 minutes before baking to help the lattice hold its shape.
Chilling the pie before baking is key—cold dough holds its shape better, ensuring your lattice stays crisp, clean, and beautiful during baking. -
Egg Wash & Sprinkle
Whisk 1 egg with 1 tablespoon water. Brush over the top crust. Optionally sprinkle with a little sugar for sparkle and crunch.
Egg wash gives the pie a golden, glossy finish with bakery-style appeal.
Baking the Pie
-
Preheat the Oven
Preheat your oven to 425°F (220°C).A hot oven ensures a crispy crust while baking. -
Bake the Pie
Place the pie on a baking sheet (to catch any drips) and bake for 15-20 minutes. Then, reduce the temperature to 350°F (175°C) and continue baking for another 30-35 minutes until the crust is golden brown and the filling is bubbling.
Keep an eye on the crust edges; if they brown too quickly, cover them with foil.
Cooling and Serving
-
Cool the Pie
Remove the pie from the oven and let it cool on a wire rack for at least 1 hour before slicing.
Cooling helps the filling set, making it easier to cut clean slices. -
Serve and Enjoy
Slice and serve with a scoop of vanilla ice cream or a dollop of whipped cream for the ultimate treat!Don’t forget to take a picture before it disappears!
Note
- Use fresh, ripe cherries for the best flavor; if using frozen, ensure they are completely thawed and drained.
- For a deeper flavor, mix sweet and tart cherries together.
- When making the pie crust, chill the butter and water before incorporating them into the flour for a flakier texture.
- Don’t overwork the dough; mix just until combined to avoid tough crust.
- Consider adding a tablespoon of lemon juice or zest to the cherry filling for brightness.
- If you prefer a glossy finish, brush the top crust with an egg wash (one egg beaten with a tablespoon of water) before baking.
- Allow the pie to cool completely before slicing to ensure clean cuts and prevent the filling from running.
- Store leftover pie in the refrigerator for up to 3 days; reheat slices in the oven for a warm treat.
- For a twist, experiment with spices like cinnamon or nutmeg in the filling for added complexity.
- Pair with vanilla ice cream or whipped cream for an indulgent dessert experience.