

Origin and History
A celebratory layer cake has long marked rites of passage, but coffee‑chocolate confections gained popularity in the early 20th century when espresso bars swept Europe and America. This modern interpretation fuses rich French buttercreaming techniques with Italian espresso culture—an edible diploma honoring the Class of 2025 and the timeless pairing of cocoa and caffeine.
Unique Ingredients and Flavors
The foundation is a coffee‑infused chocolate sponge, moist from brewed espresso and dark cocoa. Two complementary buttercreams—a robust dark‑mocha and a silky latte—cloak the tiers in a sophisticated ombré, while a glossy ganache drip adds depth and shine. The result is a balanced flavor profile that travels from bold roast to creamy finish in every bite.
Baked to Share
Designed as a dramatic centerpiece, this cake feeds a crowd yet remains approachable for the home baker. Its dual‑tone exterior symbolizes the transition from student to graduate: grounded in knowledge, bright with promise.

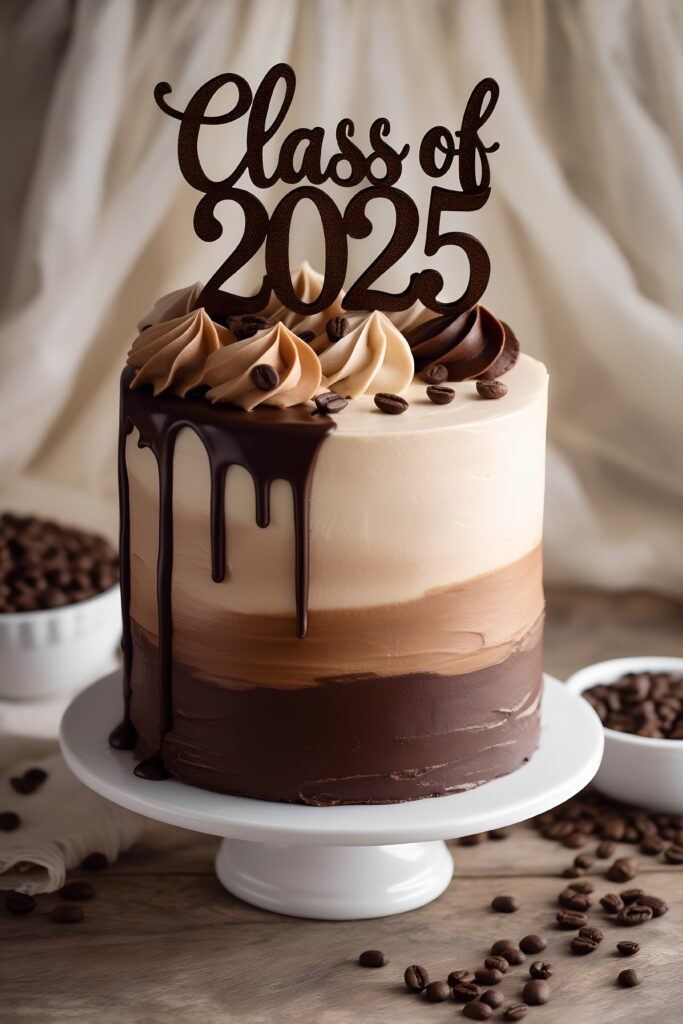
Chocolate Espresso Class of 2025 Celebration Cake
Description
Three layers of espresso‑soaked chocolate sponge are wrapped in dark‑mocha and latte buttercream, finished with a chocolate ganache drip and espresso‑bean flourish.
Ingredients for Chocolate Espresso Class of 2025 Celebration Cake
Basement of Cake
Mocha & Latte Buttercreams
Ganache Drip & Decoration
Instructions
Preparing the Cake Pans
-
Grease and Line
Grease three 8‑inch round cake pans with butter or non‑stick spray. Line the bottoms with parchment rounds and lightly dust the sides with cocoa powder.
Cocoa dusting prevents white flour marks on the dark sponge and releases cakes cleanly.
Making the Batter
-
Mixing Dry Ingredients
In a large bowl, whisk together flour, sugar, cocoa powder, baking powder, baking soda, and salt until uniformly combined.
Sifting the dry mix beforehand yields a finer crumb and prevents lumps. -
Mixing Wet Ingredients
In a separate bowl or large jug, blend cooled espresso, milk, oil, eggs, and vanilla until smooth.
Room‑temperature liquids emulsify more easily and promote an even rise. -
Combining the Batter
Pour wet ingredients into the dry mixture and stir with a balloon whisk or spatula until just smooth; small streaks of flour are acceptable.
Over‑mixing develops gluten and can toughen the cake—stop when no dry patches remain.
Baking the Cake Layers
-
Divide and Bake
Divide batter evenly among the prepared pans. Bake at 350 °F for 25–30 minutes, or until a toothpick inserted in the center emerges with a few moist crumbs. Cool in pans 10 minutes, then invert onto wire racks to cool completely.
Making the Buttercreams
-
Base Buttercream
Beat the softened butter on medium speed until pale and fluffy, about 3 minutes. Gradually incorporate powdered sugar, salt, and vanilla until the mixture is light and creamy. This forms the base for both buttercreams.
Scrape the bowl frequently to avoid dense pockets of sugar and ensure a silky texture. -
Dark‑Mocha Buttercream
Transfer half of the butter base to a bowl; whisk in cocoa powder and espresso, thinning with splashes of cream to a spreadable consistency.
If the frosting becomes too stiff, add an extra tablespoon of cream for silkiness. -
Latte Buttercream
To the remaining half, beat in enough cream to achieve a light, airy latte‑colored frosting.
Avoid over‑beating once the desired shade and texture are reached.
Assembling the Cake
-
Level and Fill
Level any domed tops. Place the first layer on a serving board; spread with mocha buttercream. Repeat with remaining layers.
A rotating turntable speeds up even filling and stacking. -
Crumb Coating and Final Ombré Frosting
Apply a thin crumb coat of mixed buttercreams over the entire cake and chill for 20 minutes. Then cover the lower half in mocha buttercream and the upper half in latte buttercream, using a bench scraper to smooth and blend where they meet for a subtle ombré.
Keep a cup of hot water nearby to warm the scraper for ultra‑smooth sides.
Decorating the Cake
-
Ganache Drip
Heat cream to a simmer, pour over chocolate chips and butter, rest 2 minutes, then stir until smooth. Cool ganache to 90–95 °F and transfer to a squeeze bottle; drip around the cake’s upper edge, then pool remaining ganache on top.
If ganache is too warm, drips will run; if too cool, drips will seize—aim for a honey‑like flow. -
Finishing Decorations
Pipe alternating rosettes of mocha and latte buttercreams on the crown and nestle espresso beans between them. Before serving, you can optionally attach a laser-cut wooden topper to the cake with the elegant text Class of 2025.
For sharp rosettes, use a star tip and wipe it clean between colors. -
Chilling and Serving the Cake
Refrigerate the finished cake for at least 30 minutes to set the frosting and ganache. Bring to room temperature for 20 minutes before slicing with a warm serrated knife for clean portions.
A brief chill firms the structure, while serving at near‑room temperature maximizes flavor and mouthfeel.
Note
- Use freshly pulled espresso for the deepest flavor; leftover coffee works in a pinch but will be milder.
- Dutch‑processed cocoa gives a darker crumb that aligns with the mocha theme.
- Always cool sponges fully before frosting to prevent buttercream melt.
- For a taller statement cake, bake four thinner layers and adjust bake time accordingly.
- Substitute decaf espresso for a caffeine‑friendly version suitable for all ages.
- Store assembled cake in a covered box at room temperature for up to 24 hours or refrigerate up to 3 days; bring to room temperature before serving for best texture.
- Freeze unfrosted sponges tightly wrapped for up to 2 months. Thaw overnight in the fridge before use.
- Add a teaspoon of instant espresso powder to the ganache for an extra jolt of coffee.
- A pinch of sea salt on top of the ganache intensifies chocolate notes.
- Leftover buttercream keeps refrigerated for one week—use on cupcakes or freeze for future projects.